Wild thyme field guide
Growing Thyme from Seed: Sowing, Pricking Out and Planting Out
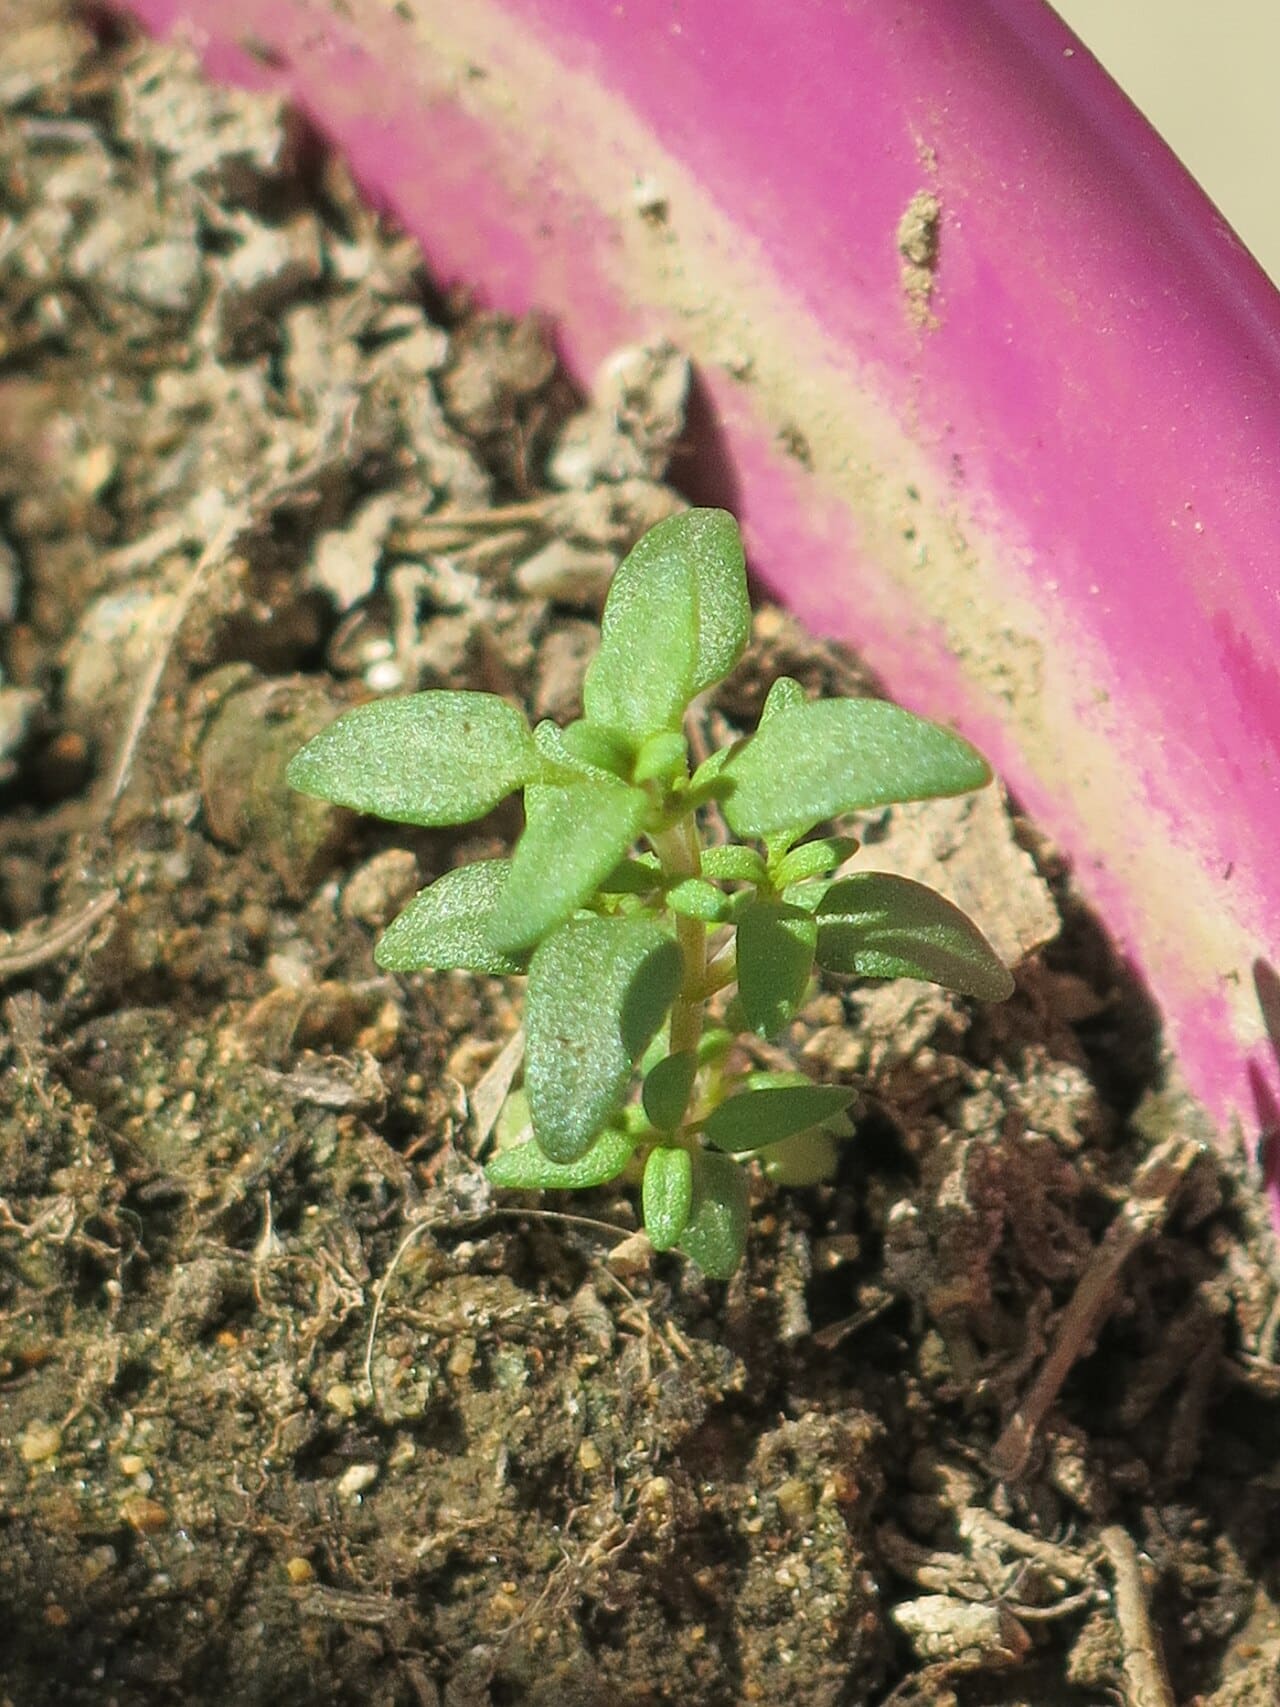
On a south-facing windowsill in late March, a seed tray of thyme looks like nothing at all for the first week: a square of damp compost with a faint dusting of brown specks that could easily be grit. That is the right look. Thyme seed is among the smallest a home gardener handles, and almost every early failure comes from treating it like something larger, burying it, drowning it or leaving it somewhere cold and dark where it sits doing nothing until it rots.
This guide covers common thyme and the other culinary kinds sold as seed. For the low, mat-forming plants that grow on Breckland heaths and in rock gardens, see the wild thyme guide, which explains where those plants fit.
What seed to buy, and what not to expect from it
Seed packets on garden-centre racks are mostly common thyme, Thymus vulgaris, a bushy plant that the RHS describes as reaching about 30cm. Some suppliers also sell seed of creeping or “wild” thyme mixtures. Both are worth sowing. What seed cannot do is copy a named variety. The RHS is plain about this: plants grown from seed collected off a named cultivar will not reliably resemble the parent, and most named thymes are sold only as plants for exactly that reason.
So a packet will give you thyme, often a lot of it, with some variation between seedlings.
If the aim is a particular look, for instance the dark pink to magenta mat of a Coccineus Group plant or the yellow-flecked leaves of ‘Doone Valley’, buy one plant and multiply it by cuttings or division instead. The creeping thyme page covers those named forms and how to increase them. Seed suits the opposite situation: a gardener who wants a dozen ordinary culinary plants for a herb bed, a long edge along a path, or enough spare plants to give away, and who is happy to wait.
When to sow in East Anglia
The RHS recommends sowing thyme indoors in spring. In practice the window is set by two things: the warmth the seed needs to germinate, and the date young plants can safely go outside. Germination is best at 15–20°C. Planting out happens from mid-spring to early summer, once plants have been hardened off.
A Norfolk spring tends to run cool and dry, and frosts on clear nights can turn up later than the calendar suggests, especially inland. That argues for sowing indoors rather than trying to sow direct into cold ground. The table below lays out a typical sequence for a sowing on a warm windowsill or in a heated propagator. Treat the months as a guide; the plants, not the calendar, decide when each step is ready.
| Stage | Typical month | What decides it |
|---|---|---|
| Sow on the surface indoors | March to April | A spot that holds 15–20°C |
| Seedlings appear | About two weeks after sowing | Warmth and light |
| Prick out into 7.5cm pots | April to May | Several true leaves on each seedling |
| Harden off outdoors by day | May | Settled weather, no hard frost forecast |
| Plant out | Mid-May to June | Well-rooted, strongly growing plants |
| First proper harvest | The following spring | About a year from sowing |
A later sowing, in May, still works and needs less artificial warmth. Plants will be smaller going into their first winter, so in a heavy or wet garden it can be wiser to keep them in pots under cover until the next spring.
How to sow on the surface
Use small pots or modular trays and fill them with moist, peat-free seed compost. Firm it gently and level the top. Scatter the seed thinly over the surface; with seed this fine, a pinch tapped from a folded piece of paper gives far more control than shaking from the packet. Do not cover it. Light and contact with damp compost are what it needs.
Watering from above at this stage washes tiny seed into corners and clumps. Stand the pot in a shallow tray of water for a few minutes instead, then lift it out to drain. A clear lid, or a plastic bag held off the surface with a couple of sticks, keeps the compost from drying out while the seed takes up water.
Warmth and light
A windowsill over a radiator, a propagator, or a warm conservatory all suit. The RHS figure is 15–20°C, and its advice is to keep the seed warm and bright; germination should follow within a couple of weeks. Cooler conditions slow things down rather than stopping them, but every extra week on cold wet compost raises the risk of fungal problems.
The first fortnight
Once green appears, take the cover off. Seedlings under a humid lid with no air movement are exactly where damping off starts, a fungal disease that makes young stems collapse at soil level, and the RHS ties it directly to overwatering. Keep the compost just moist. Turn the pot daily if the light comes from one side, or the seedlings will lean hard towards the glass and grow thin.
Sowing creeping and wild thyme seed
Packets labelled creeping thyme or wild thyme follow exactly the same method, with two differences worth knowing. The plants they produce are low and spreading, so a single seedling eventually covers far more ground than a bushy culinary thyme, and spacing at the wider end of the 20–30cm range makes sense. They are also more variable from seed than common thyme: flower colour can range across pinks and mauves within one tray, which suits a naturalistic planting in gravel or between paving and suits a formal edge rather less.
Sowing directly outdoors is possible once the soil has warmed in late spring, but on open ground the seed is so small that rain splashes it away, birds and ants move it, and weed seedlings come up faster and smother it. A pot or module indoors loses fewer seeds and gives plants that can be set out exactly where they are wanted. For anyone planning a whole area of creeping thyme, raising plugs in modular trays and planting them out in a grid is the usual route, and the guide to creeping thyme lawns explains the site preparation that matters far more than the seed itself.
Bees find the flowers of seed-raised creeping thyme just as readily as those of named varieties; a sunny patch in flower in June is rarely quiet.
Pricking out and potting on
When the seedlings have several leaves, the RHS suggests moving each one into its own pot of about 7.5cm. Handle them by a leaf, never the stem, and lift with a pencil or a plant label so the roots come out with some compost attached. Thyme seedlings are small and often come up in tight clusters; separating every single one is fiddly, and moving little clumps of three or four together is a reasonable shortcut for plants destined for a herb bed.
For the new pots, the RHS recommends a peat-free, soil-based compost such as John Innes No 2. Thyme dislikes sitting wet, so mixing in some horticultural grit improves drainage; for containers the RHS suggests grit at up to 25 per cent of the volume, and the same open mix works well for young plants. Water them in, keep them out of strong midday sun for a day or two, then back into bright light.
Pots of seedlings sitting on a kitchen windowsill in April also tend to collect visitors. Fungus gnats, the tiny black flies that hover over damp compost, are a reliable sign the pots are being kept too wet; they are a nuisance more than a threat, and letting the surface dry between waterings usually sees them off. That is about the only lesson they have to teach.
Getting young plants outside
Plants raised indoors need hardening off before they are planted. Over a week or two, stand them outside during the day and bring them back in at night, then leave them out overnight once frosts have passed. A cold frame makes this easier, as does a sheltered spot by a south-facing wall.
Plant out from mid-spring to early summer, once the young thymes are well rooted and growing strongly. Choose a warm, sunny position with light, well-drained soil. Space plants about 20–30cm apart, depending on the type, and set each at the same depth it was growing in its pot. Firm in and water once; after that, thyme is drought tolerant and rarely needs watering in the ground except in the first weeks or in a long dry spell. A mulch of grit or fine gravel around the base helps suppress weeds and keeps the foliage off wet soil, which matters more for creeping kinds that lie flat.
Heavy clay that stays wet in winter is the one site where planting straight into the ground is a gamble. The RHS advice is to grow thyme in a container or raised bed instead, and anyone gardening on the clay patches around Norwich will find that advice saves a lot of replacing.
Containers instead of the border
A pot of thyme by the back door is often more useful in the kitchen than a row at the end of the garden. The RHS suggests a container at least 15cm wide and 10cm deep for each plant, with plenty of drainage holes, filled with soil-based compost and grit. Seed-raised plants are ideal for this because a single sowing produces far more than a border needs. Pot-grown thyme dries out faster in summer and gets wetter in winter, so move containers to a rain shadow against a house wall from late autumn, where they stay drier.
What to watch for in the first year
Most seedling losses happen before pricking out, and nearly all of them come back to wet compost. After planting, slugs and snails may graze young shoots; check on damp evenings in May and June. Rosemary beetle and leafhoppers can mark the leaves but rarely do serious harm.
Patience is the harder part. The RHS estimate is about a year before a seed-raised plant is ready for harvesting, and that matches the way the plants grow: a summer spent making roots and a woody base, a winter mostly at rest, then a burst of soft new growth the following spring. A few sprigs in the first September will not hurt, and the flowers, which taste much like the leaves, can be picked for salads.
Thyme kept for several years gets woody and straggly in the middle, and the RHS view is that old plants are usually best replaced. A packet of seed every third or fourth spring keeps the supply young without buying new plants. If the newest batch comes up early enough to be ready by the time fresh herbs are back on the seasonal produce calendar, so much the better.
Sowing a second packet of a different kind alongside the first is a sensible experiment. Lemon thyme is usually sold as plants rather than seed, but the lemon thyme guide explains how to root cuttings from one, which pairs well with a tray of seed-raised common thyme.
The RHS thyme growing guide is the reference for the timings above. Before you sow, try one small test: press a pinch of seed onto a single damp pot this weekend and put it on the warmest bright sill in the house, then compare how quickly it comes up with a pot on a cooler sill a week later.
Questions
Should thyme seed be covered with compost?
No. The RHS advises scattering thyme seed thinly over the surface of moist, peat-free seed compost and leaving it uncovered, because the seed is so small. Press it lightly so it makes contact with the compost, then cover the pot or tray with a clear lid or bag to hold moisture. Remove the cover once the first seedlings appear, so air can move around them and damping off is less likely.
How long does thyme seed take to germinate?
Kept somewhere warm and bright, at roughly 15–20°C, thyme seed usually comes up within a couple of weeks. A cold windowsill in March can stretch that considerably, and patchy germination is normal for such fine seed. If nothing has appeared after four weeks, check the temperature first rather than sowing again straight away, since too cool a spot is the usual cause.
Will seed from my creeping thyme grow into the same plant?
Usually not. Named varieties, such as most creeping thymes sold by nurseries, do not reliably come true from seed, so seedlings may differ in flower colour, leaf and habit. Seed is sold for some culinary species, and those are the sensible choice for sowing. To copy a particular named plant, take cuttings, peg down a stem to layer it, or divide a mat in spring or autumn.
When can I start picking thyme grown from seed?
Expect to wait about a year. A spring sowing gives small plants by midsummer, but they need a full season to build enough stems that you can cut without weakening them. Light picking of a few shoot tips in the first autumn does little harm. From the second spring onward, regular snipping of soft new growth keeps the plant compact and gives the best flavour.